Let’s take a very simple example which works straight out of the box – Joomla and MariaDB, using images straight from the public Docker repository Docker Hub. First start the database we want to connect to.
docker run --name joomladb -e MYSQL_ROOT_PASSWORD=my-secret-pw -e MYSQL_DATABASE=joomla -e MYSQL_USER=joomla -e MYSQL_PASSWORD=joomla -d mariadb:latestThis will pull the latest mariadb image from the repository (if you haven’t already got it) and initialise it with the environment variables – root password, and an empty database schema called joomla whose user and password are both joomla.
Now start joomla and link it to the mariadb container
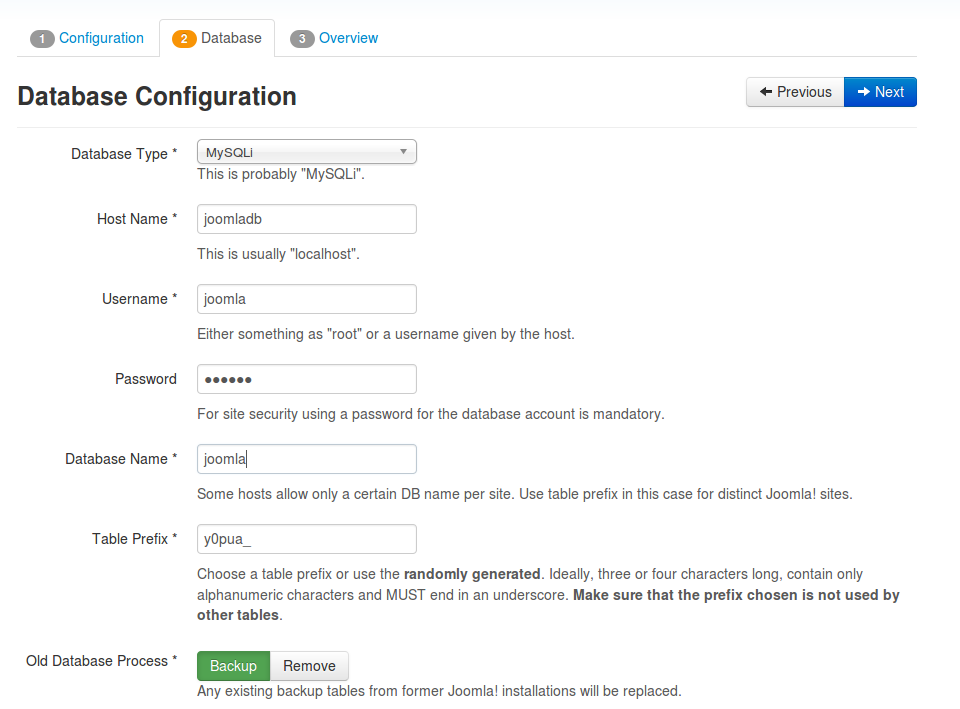
docker run --name some-joomla --link joomladb:mysql -p 8080:80 -d joomla:apache-php7This pulls an image with Joomla 3.5, Apache and PHP7 which I highly recommend, even though by Docker standards is quite large (around 500Mb). This is linked to the previously started container and is accessible from your host IP on port 8080. You will need to go through the normal Joomla setup process except that the database details are entered as per our mariadb container
You must remember to commit and changes you make to these containers prior to removing them, otherwise you will have to re-install all over again. As you can see these are quie lengthy and error prone commands. Docker has an answer to this problem docker-compose, a tool for defining and running multi-container Docker applications. The documentation on the website is excellent so I don’t propose to cover it here, instead just show the docker-compose.yml file for this joomla application would be
joomla:
  image: joomla:apache-php7
  links:
    - joomladb:mysql
  ports:
    - 8080:80

joomladb:
  image: mariadb:latest
  environment:
    - MYSQL_ROOT_PASSWORD=my-secret-pw
    - MYSQL_DATABASE=joomla
    - MYSQL_USER=joomla
    - MYSQL_PASSWORD=joomla
Note:
As with all YAML files the formatting/indentation is very important.
The command to run the application will simply be docker-compose up in the same directory as the docker-compose.yml file is stored. In this manner you can link as many containers as you desire e.g. in the above example we could have used separate nginx, php7-fpm and mariadb containers to achieve the same results.
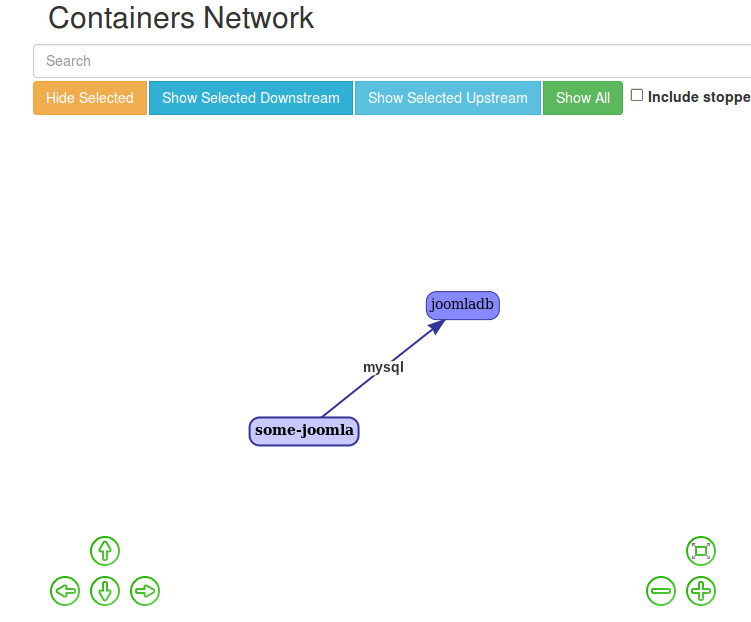
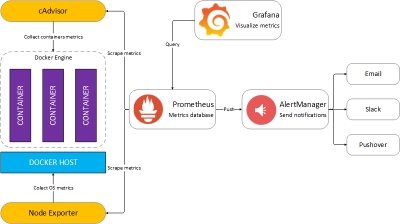
Screenshot showing the linked containers using dockerui, an excellent tool to use locally, or behind a secured proxy on your server, as it has no in-built security. In a later article I will be reviewing dockerui and several other tools that are available to assist with Docker development.
Tip 1:
Don’t leave docker compose files like this on your server since they contain all your passwords in plain text format. In practice I use Ansible to push all my locally stored commands to my Bhost containers as playbooks. Again this will be the subject of a full tutorial to come later.
Data Volumes
From Docker:-
A data volume is a specially-designated directory within one or more containers that bypasses the Union File System. Data volumes provide several useful features for persistent or shared data:
- Volumes are initialized when a container is created. If the container’s base image contains data at the specified mount point, that existing data is copied into the new volume upon volume initialization. (Note that this does not apply when mounting a host directory.)
- Data volumes can be shared and reused among containers.
- Changes to a data volume are made directly.
- Changes to a data volume will not be included when you update an image.
- Data volumes persist even if the container itself is deleted.
Data volumes are designed to persist data, independent of the container’s life cycle. Docker therefore never automatically deletes volumes when you remove a container, nor will it “garbage collect” volumes that are no longer referenced by a container.
In practice I have them very useful for holding static read-only files e.g. apache or nginx configuration directives, but much more complex when dealing with read and write files. Here is why :-
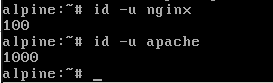
Standard system UID’s for nginx and apache used by Alpine Linux, which future Docker official images are to be on.
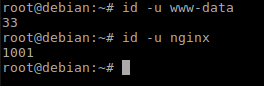
Standard system UID’s for nginx and apache used by Debian and Ubuntu. Most current official Docker images are based on Ubuntu.
As you can see they are quite different. Docker uses the UID’s and GID’s for defining who can read and/or write to what. So if you want to put your base joomla files on your host file syste. and set the read/write permissions to that external volume within your container eg
chown -R apache:apache /var/www/htmlwithin an Alpine based container, your host operating system (if different) does not seem to honour those settings, as the UID/GID are different. There are apparently ways to work around this but they are very much operating system specific so you lose portability.
A simple example highlighting this problem is Eclipse Che, a developer workspace server and cloud IDE. This has a whole section of gotchas for different O/S’s to work around being able to write workspaces to the host system from within docker. Essentially you have to run it with a very specific UID (in Linux :1000 – i.e. the first user created in Debian/Ubuntu), otherwise it will not work – see the “Avoid These Common Setup Gotchas” section here.
Having said that I find the data volumes very useful during development to experiment with different configurations rather than having to build an image each time I tweak a particular configuration setting. For production however these files are built in to the final image using the Docker build COPY or ADD commands. My current development environment looks like this
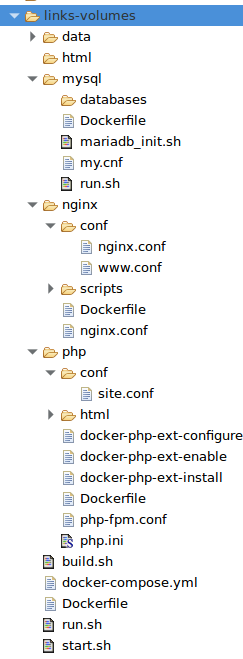
More on this in another tutorial.
I hope you have found this tutorial useful and will now be able tobuild more comlex solutions using Docker.