Webmin acts as a comprehensive interface to the underlying applications on servers, including support for configuring applications like ftp, ssh, mail, Web, databases and more. Differing from other control panels, the core Webmin interface is intended for system administrators with root access to their servers, and includes a user-based package to enable your users (or clients) to access their own domains, email, and more, within a limited scope. Webmin supports running under SSL.
The application runs on its own mini-Web server so as to be available even when your primary Web server software is not running (i.e. Apache, etc.), and is powered by a number of Perl-based applications that directly interface with your system configuration files. So if you accidentally misconfigure your web server Webmin still runs.
Before you begin
Webmin is an amazingly powerful tool so Hackers try and use it where it is available. By default it sets itself up to run automatically on system boot on port 10000. Hackers know this and when they find that port open can try to brute force your server. It is essential that once installed you change these settings immediately. I explain how later in this tutorial, but do NOT abandon this task till later.
I you remember one thing from this tutorial it should be that Webmin is only switched on when you need to use it
Installation
Note This tutorial uses Webmin 1.69.. At the time of writing 1.70 is available but doesn't install 3rd party modules correctly e.g. CSF + LFD (Firewall and login failure daemon). Change the version numbers if you don't need these facilities
Ubuntu/Debian
In root terminal mode issue following commands
wget http://sourceforge.net/projects/webadmin/files/webmin/1.690/webmin_1.690_all.deb/download
dpkg -i webmin_1.690_all.deb
On a vanilla install of Debian or Ubuntu VPS's on Bhost this will throw up errors because of missing Perl dependencies. To fix these use
apt-get -f install
As an aside that last command is an essential in anyone's Debian/Ubuntu shell arsenal. It installs all required dependencies for 3rd party packages.
CentOS./Fedora
In root terminal issue following commands
http://sourceforge.net/projects/webadmin/files/webmin/1.690/webmin-1.690-1.noarch.rpm/download
rpm -U webmin-1.690-1.noarch.rpm
The rest of the install will be done automatically, and the webmin server will be active. The administration username set to
root
and the password to your current root password. You should now be able to login to Webmin at the URL https://yoururl or IP address:10000/.
Installation Troubleshooting
As you can see from the above access url's Webmin initially runs on port 10000. Many operating systems block access to port 10000 by default, as they have a firewall activated as part of the installation process. This may prevent you from logging into http://yourserver:10000/ from another system on your network or over the Internet.
The alternative is to login as root via SSH, and manually edit the firewall configuration file. On Redhat and derived systems, this is
/etc/sysconfig/iptables
, while on Debian it is
/var/lib/iptables
. The line you need to add is :
-A INPUT -p tcp -m tcp --dport 10000 -j ACCEPT
It should be added in the file just after similar lines which grant access to ports 80, 22 and so on.
Once this line has been added, you will need to apply the firewall configuration. This is typically done with the command
/etc/init.d/iptables restart
.Now/Immediately
Login to webmin and change the port that it runs on. Click on Webmin tab on the left menu then webmin Configuration
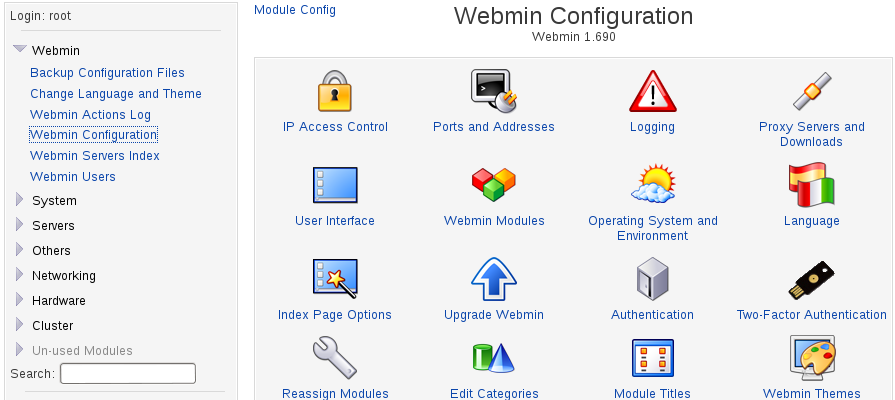
Now click on Ports and addresses
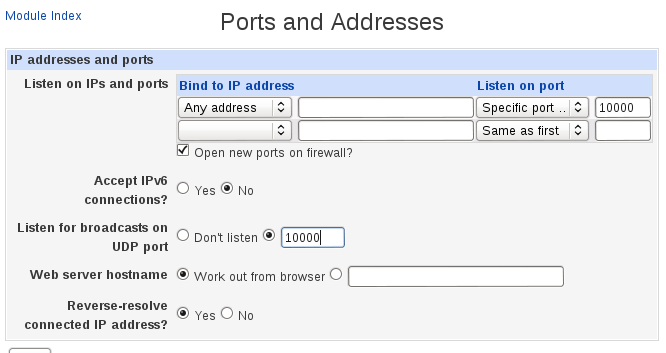
Change the ports to a different number, preferably with five digits so as not to conflict with other services you may be running on your VPS. By default Webin tries to open this port in your firewall. if this doesn't happen you will need to open your new port in the firewall as described above. Once you are logged back in with your new port number save this as a bookmark in your browser so you do not forget it.
Now prevent webmin from running on system startup/reboot.
Debian/Ubuntu
update-rc.d -f webmin remove
CentOS/Fedora
chkconfig httpd off
chkconfig httpd --del
Starting and Stopping Webmin Service
Debian/Ubuntu
service webmin start
service webmin stop
CentOS/Fedora
chkconfig webmin on chkconfig webmin off
DON'T FORGET TO SWITCH WEBMIN OFF WHEN YOU HAVE FINISHED WITH IT
Configure Webmin for your VPS
By default Webmin installs itself to configure a standard set of services. In order to ensure you can configure all the service you have enabled on your own VPS you need to enable the appropriate Webmin modules. In Webmin Configuration click on Webmin Modules. This will automatically install the required modules that Webmin has available to administer you services.